Step-by-Step: How to Organize your Google Browsers
Sharing is caring!
When I started to work online, there comes a time that I had two clients one at a time. They have different google access, they have different website app need to open at the same time but they need to be open in different browsers.
Two clients plus other personal accounts and access, get me confused. Of course, I want to separate some of my files, links I visited and website apps I open when my browser startup. And most importantly, I want to bookmarks some important links for the client I work on without needing to bookmark them when I recover my desktop. I mean I need to recover them as well when I need to reformat my desktop.
That gives me the idea of organizing my folders, my files and the website apps that I open just using the Google Browser. Of course, they are not developed without a purpose, and I am glad I am able to discover them.
Here are the following items you will also discover upon watching the video, in case you need a detailed step by step, scroll down for the detailed steps.
- Adding a New Google Chrome Browser User
- Connecting your Google Chrome Browser to your Google Account
- Adding New Folder in the Bookmarks Bar
- Organizing your Bookmarks Bar
- Saving Links to Folder in the Bookmarks Bar
- Setting Up Startup Pages
Detailed Steps in Organizing Your Google Browsers
Adding a New Google Chrome Browser User
How To Add a New User in Google Chrome Browsers
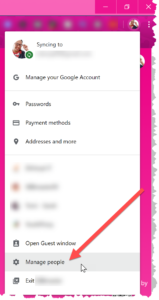
Step 1 : Click the Account avatar on the upper right corner of your Google Browser

Step 2 : Select “Manage People” in the dropdown list
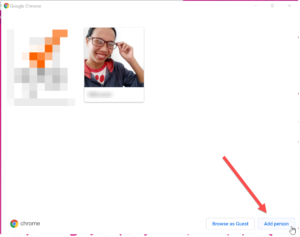
Step 3 : A window will open to show the list of People, click the “Add person” button
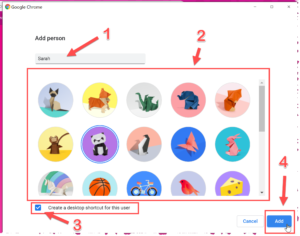
Step 4 : Enter a name for that browser > Select an avatar for that account > Check “Create a desktop shortcut for this user” > Click the “Add” button
Step 5 : A new Google Browser is created, the Account avatar will show your selected avatar from Step 4
Connecting your Google Chrome Browser to your Google Account
The advantage of turning on the “Sync” is to save your info and activities in that Google Account. When you sync your Google Account, you will automatically sign-in to all your Google services you visited including YouTube, Gmail and Search. You can also see and update your info across all your devices, and the best reason why sync-in is good, is when you change devices, either you lose your device or get a new device, you will be able to retrieve all your bookmarks, history, passwords and other settings.
ASENSO TIP 101:
Only turn-on Google Chrome “sync-in” with devices you own. If you’re using a public computer or other devices, use guest mode instead. This is to protect your account and access.
How To Connect Google Account in Google Chrome Browser
Step 1 : To store your Google Browser’s bookmarks, history, settings, and more, connect it to your Google Mail account by Signing-in using your Gmail

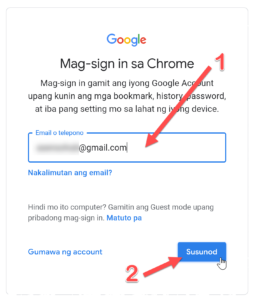
Step 2 : Enter your Gmail account and click Next
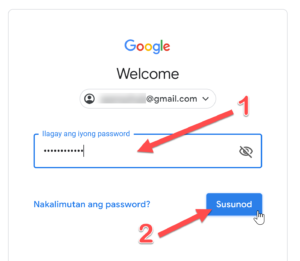
Step 3 : Enter your Gmail’s password and click Next
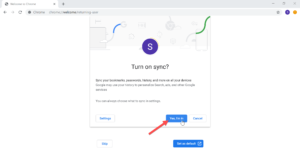
Step 4 : After successful login, click on the “Yes, I’m in” button to sync all your data on all your devices. You can always choose what to sync using Google Browser’s Settings.
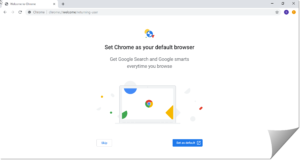
Step 5 : After syncing-in your profile, it’s either you “Set” that Google Browser as your default browser or you can just click “Skip” when not sure.
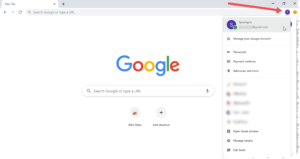
Step 6 : To check your Google Chrome Browser’s account, you can always click the Account avatar on the upper right corner.
Step 7 : If you have “Checked” the checkbox in Step 4 (Create a desktop shortcut for this user), you will be able to see the Google Chrome Browser in your desktop.
![]()
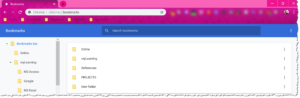
Adding New Folder in the Bookmarks Bar
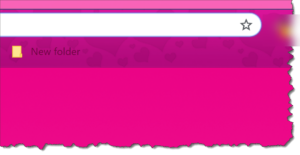
Bookmarks bar is a great way to save and organize specific website or links so you can revisit them without memorizing it’s web address.
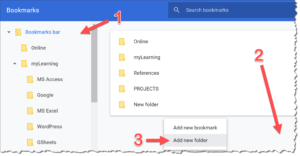
How to add a Folder in the Bookmarks bar using the Bookmarks bar
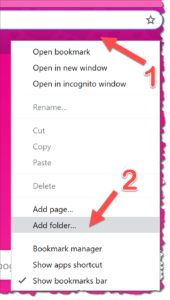
STEP 1 : Right click the Bookmarks bar then select “Add folder” from the dropdown list
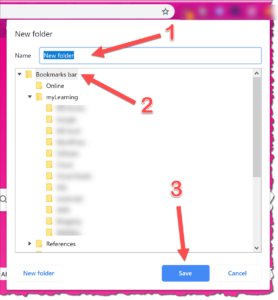
STEP 2 : A window will open for adding a new folder > Enter the name of the folder > Select “Bookmarks bar” from the list of folders > Click “Save” button
STEP 3 : The new folder will be saved and seen in the Bookmarks bar
How to add a Folder in a specific folder using the Bookmarks bar
STEP 1 : Right click the Bookmarks bar then select “Add folder” from the dropdown list
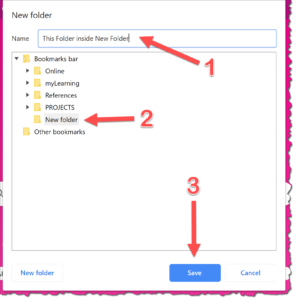
STEP 2 : A window will open for adding a new folder > Enter the name of the folder > Select a specific folder from the list of folders > Click “Save” button
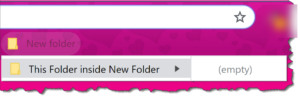
STEP 3 : The new folder will be saved and seen inside the specified folder
How to add a Folder in the Bookmarks bar using the Bookmarks manager
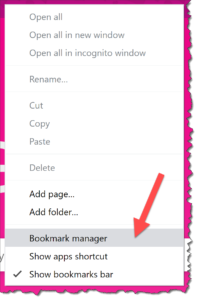
STEP 1 : Right click the Bookmarks bar then select “Bookmarks manager” from the dropdown list
STEP 2 : The Bookmarks manager page will open (chrome://bookmarks)
STEP 3 : Select “Bookmarks bar” or a specific folder name from the list of folders in the left panel > Right click the grey space in the right panel (below the existing folder names) > Select “Add new folder”
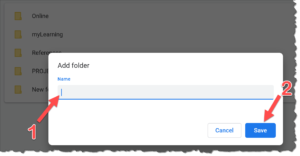
STEP 4 : A pop-up will appear > Enter the name of the folder > Click “Save” button
Organizing your Bookmarks Bar
We can organize our bookmarks and file them in custom folders by just dragging them to move it’s places.
Here is a video on how to move folders inside folders from the Bookmarks bar
Here is a video on how to move folders from bookmarks bar inside a folder within bookmarks bar
Here is a video on how to move folders in the Bookmarks bar or inside a specific folder using the Bookmarks page
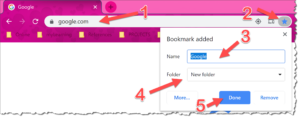
Saving Links to Folders in the Bookmarks bar
Saving links is bookmarking open tabs to save these links for later use. All you need is to make sure the correct web address is in the address bar, click the star icon, change the name of the Bookmark and select which folder to save then click “Done” button. These links are now bookmarked.
Setting Up Startup Pages
Once you have your own profiles for each of your works, you can now open different links once you open that browser. How does it work? If you open your work profile browser, you can setup pages to open your work email or links related to your work. If you open your personal profile browser, you can setup to open pages like your social media accounts or your personal email.
How to Setup Startup Pages
STEP 1 : Click the hamburger icon beside your browser’s avatar and select “Settings” from the dropdown list

STEP 2 : Chrome’s Settings page will open (chrome://settings)
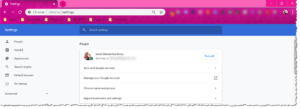
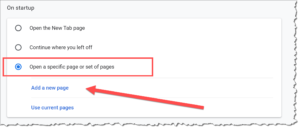
STEP 3 : Scroll down and find “On Startup”, select “Open a specific page or set of pages” and click “Add a new page”
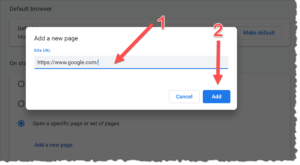
STEP 4 : A popup window will appear, enter the web address in the Site URL field then click “Add” button
STEP 5 : Once added, the page is added under the “Open a specific page or set of pages”
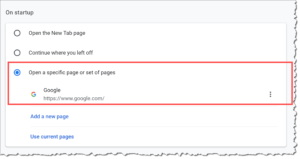
STEP 6 : Once you opened the browser, the pages listed in STEP 5 will open automatically.
Thank You...
Hope This Helps!
I hope you enjoyed this tutorial. I really created this one because many freelancers has been asking me to teach this in more detailed one.
If this helped you in any way, please do me a favor to comment below, and also share this tutorial to the world. Thank you!
Cheers and have a good day!